Readers help assist Home windows Report. Whenever you make a purchase order order using hyperlinks on our website, we might earn an affiliate price.
Learn the affiliate disclosure net web page to find out how will you help Home windows Report effortlessly and with out spending any money. Learn additional
A Easy Mail Switch Protocol (SMTP) server for Workplace 365 is important for organizations that need to secure their outgoing emails. Not solely is it reliable nevertheless integrates with the Workplace suite apps making it a no brainer to configure it.
How do I enable SMTP in Microsoft 365?
1. Arrange a static IP deal with
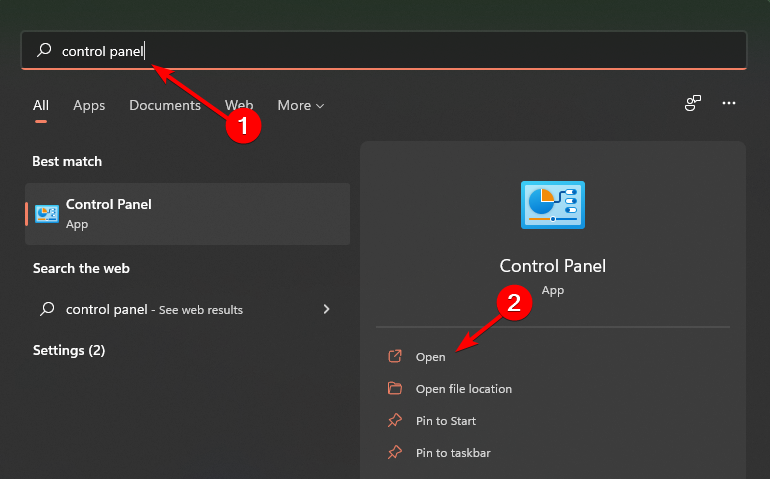
- Hit the Home windows key, kind Management Panel within the search bar, and click on on Open.
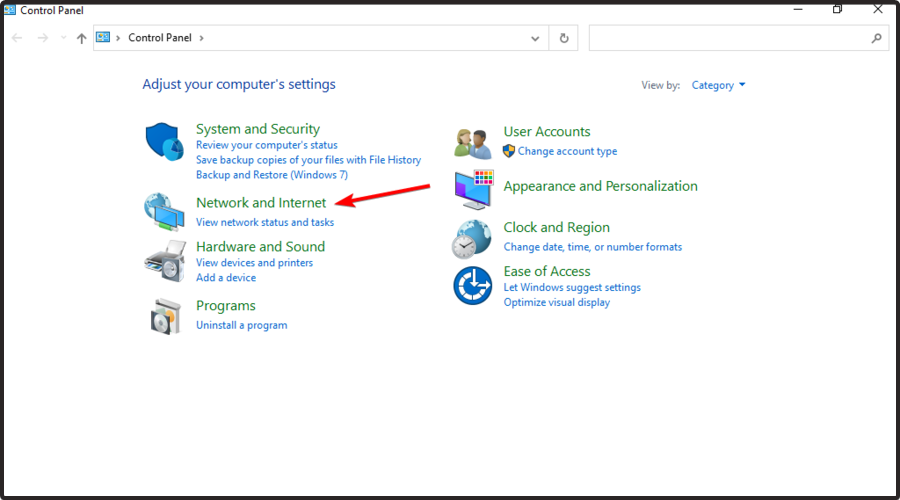
- Navigate to Community & Web.
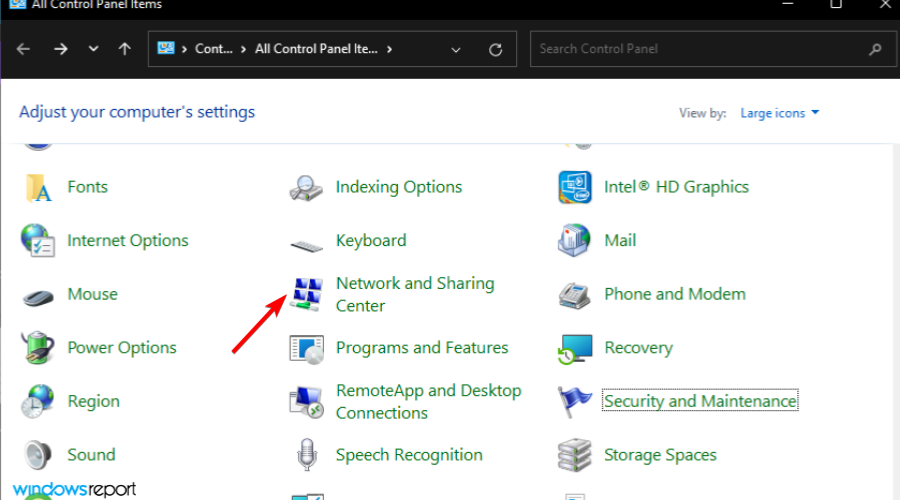
- Choose Community and Sharing Heart.
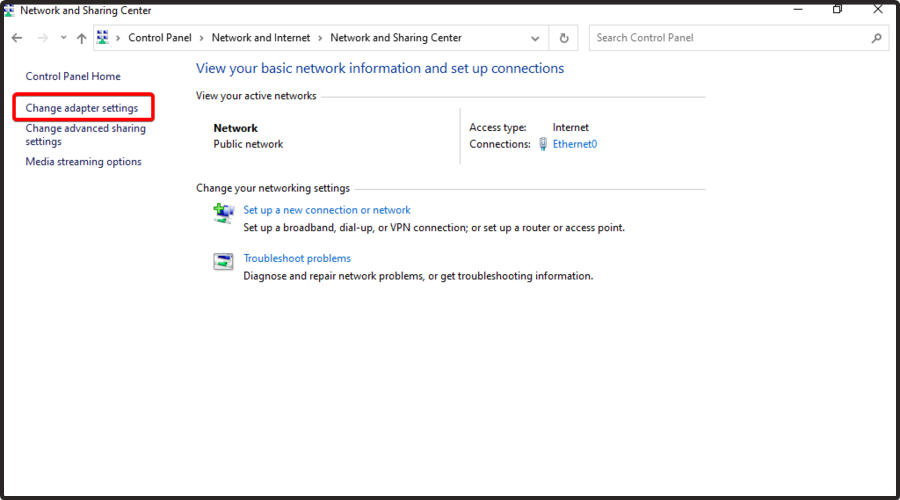
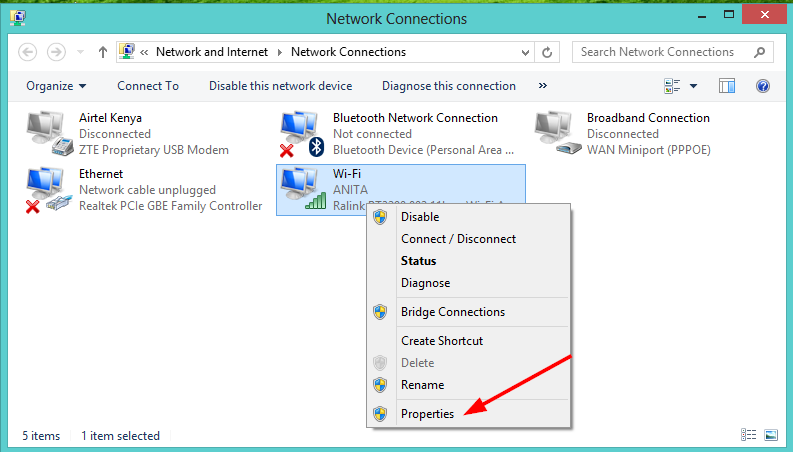
- On the left pane, select Change adapter settings.
- Proper-click your neighborhood connection and click on on the Properties risk.
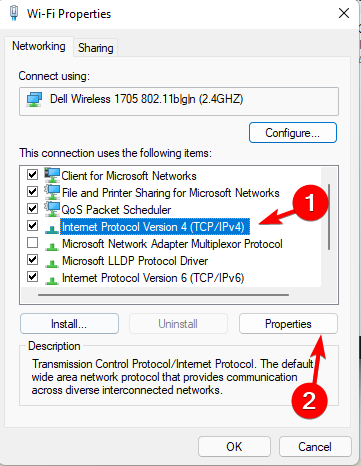
- Choose the Web Protocol Model 4 (TCP/IPv4) risk and select Properties.
- Choose Use the next IP deal with risk, and beneath Use the next DNS server addresses set Most popular DNS server and press the OK button.
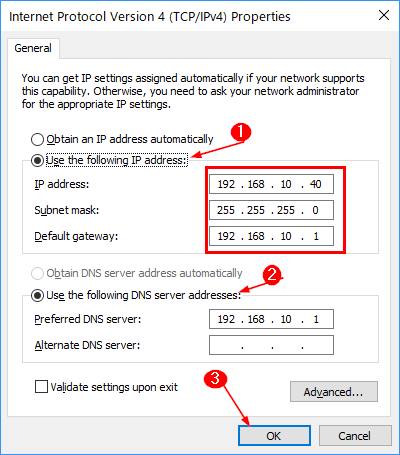
Apart from providing a relentless deal with, using a static IP makes it less complicated to create firewall insurance coverage insurance policies that enhance neighborhood security on account of now you possibly can deal with web site guests from both sides.
2. Allow TLS 1.2
2.1 Test standing
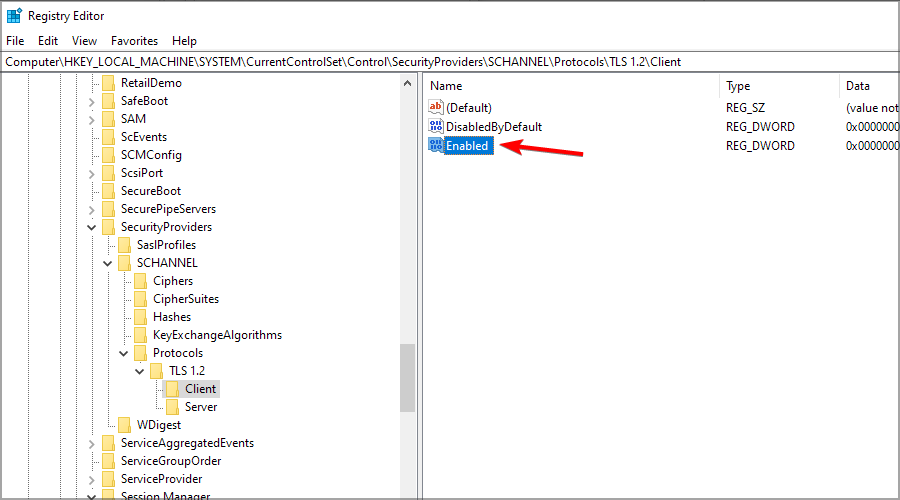
- Begin by checking whether or not or not TLS has been enabled in your system. Hit Home windows + R, kind regedit, and navigate to the next location:
HKEY_LOCAL_MACHINESYSTEMCurrentControlSetControlSecurityProvidersSCHANNELProtocolsTLS 1.2ClientEnabled - The corresponding price must be 1, it has been enabled.
2.2 Test TLS mannequin
- Subsequent, verify the mannequin to ensure it’s acceptable alongside along with your system.
- Press Home windows + X. and select Home windows Powershell.
- Enter the next command:
Get-TlsCipherSuite.
- Press Enter. Y
2.3 Allow TLS
- Click on on Home windows + R.
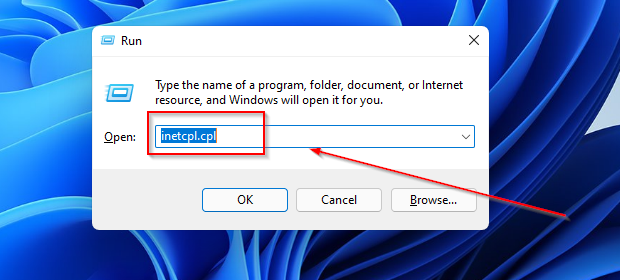
- Press Enter.
- Within the Web Properties window, click on on on the Superior tab.
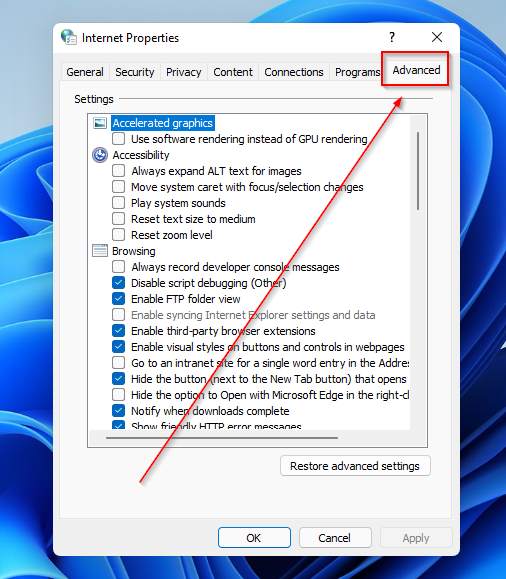
- Scroll down and study for the TSL protocol in use
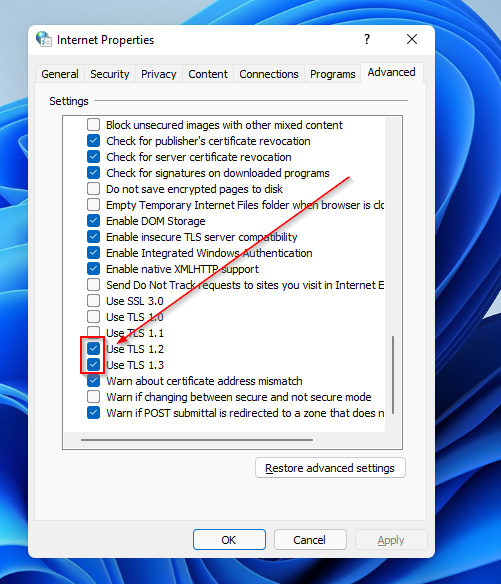
- Choose Apply.
- For those who might’t uncover the likelihood on the market, you’ll have to permit it from the Registry.
2.3.1 Allow TLS by the use of the Registry
- Earlier than you make any changes to the Registry Editor, we advocate that you just simply backup your registry or create a restore degree. This fashion, if one thing goes incorrect, you might undo the changes and avoid hurt to your PC.
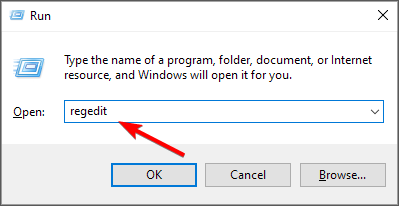
- Hit the Home windows + R keys to open the Run command.
- Sort regedit within the search subject and hit Enter.
- Navigate to the next path:
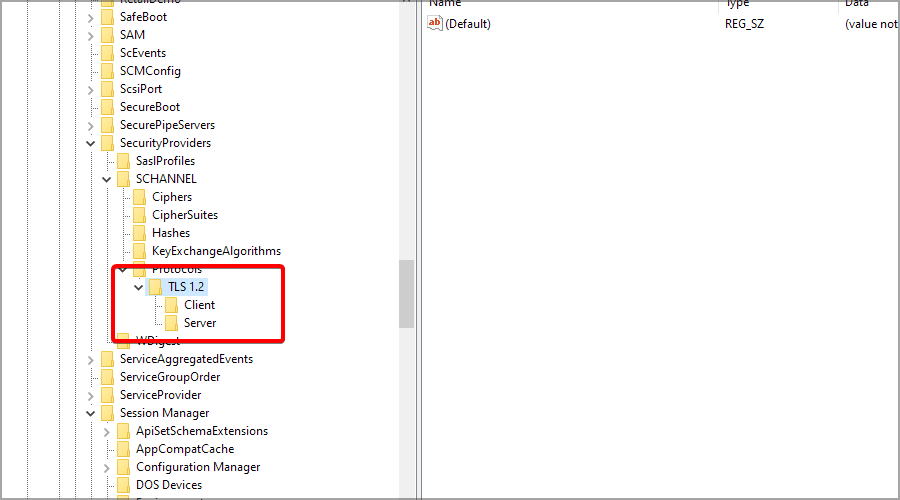
ComputerHKEY_LOCAL_MACHINESYSTEMCurrentControlSetControlSecurityProvidersSCHANNELProtocols - Proper-click on an empty space within the correct pane and select New>Key.
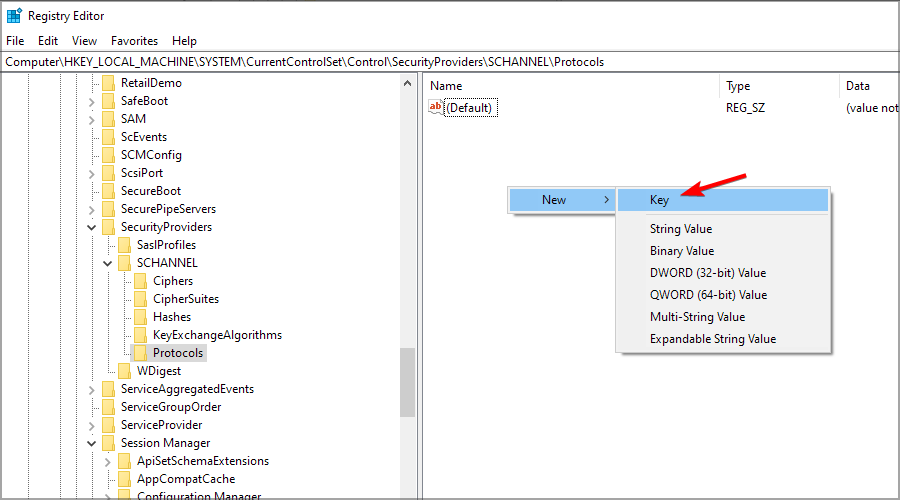
- Title the brand new key TLS 1.2 and click on on to develop it.
- Navigate to TLS 1.2, click on on on the empty space within the correct pane, and add two new keys. Title the primary one Shopper and the second Server.
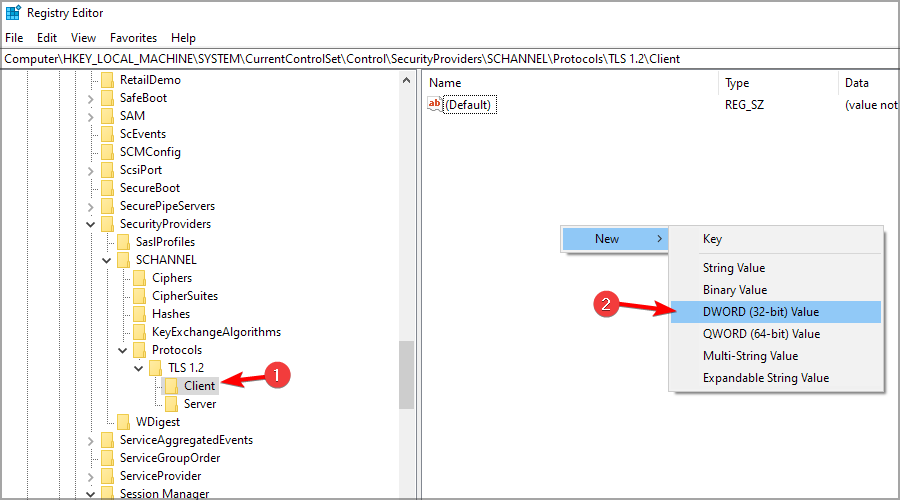
- Now, select the Shopper key, right-click within the correct pane and select New, after which DWORD (32-bit) Worth.
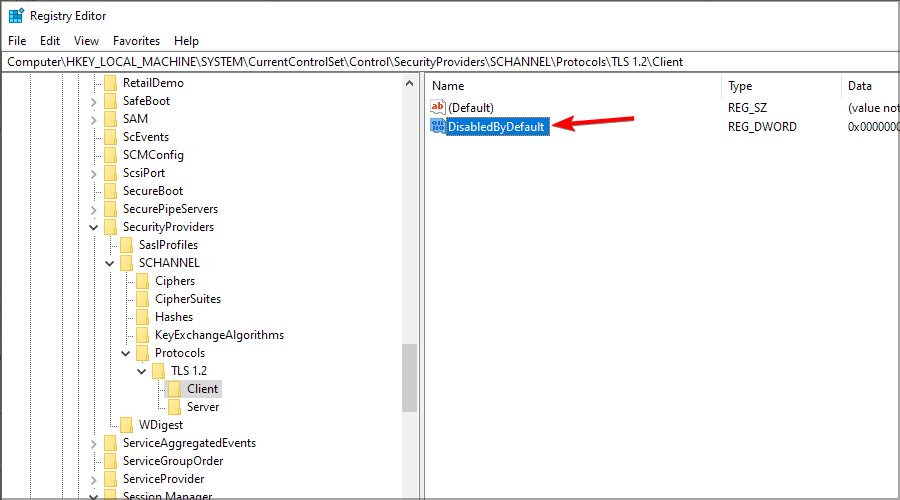
- Title the DWORD DisabledByDefault, and double-click it.
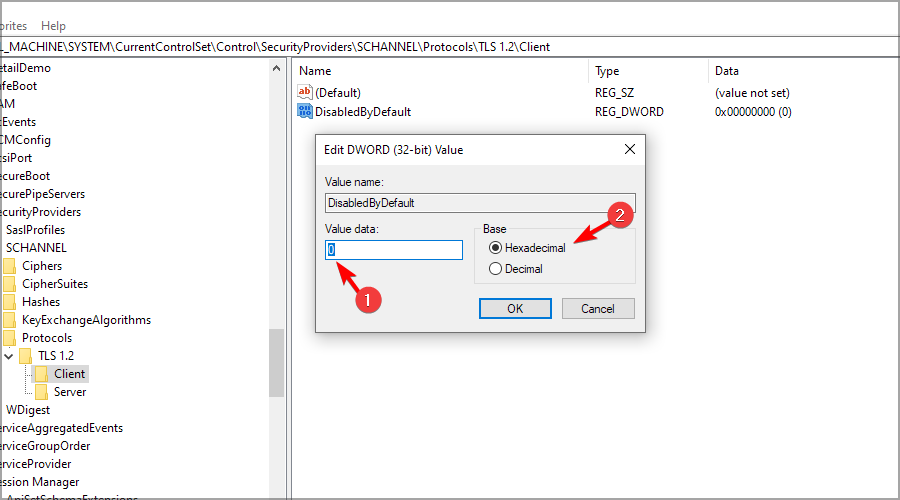
- Be sure that the Base is Hexadecimal, and the price is 0 (zero).
- Create a model new DWORD and establish it Enabled, and double-click it.
- Be sure that the Base is, as soon as extra, Hexadecimal and the Worth is about to 1.
- Shut the Registry Editor and reboot your PC.
TLS 1.2 is the preferred security protocol for e mail servers on account of it’s broadly adopted by most e mail purchasers and has sturdy encryption properties in distinction to older variations.
3. Unblock port 587
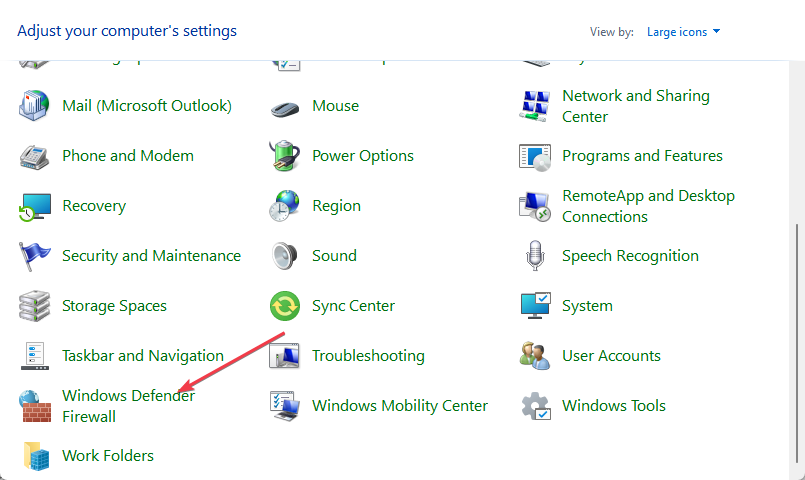
- From the Begin menu, search Management Panel, and press Enter.
- Then, click on on on Home windows Defender Firewall.
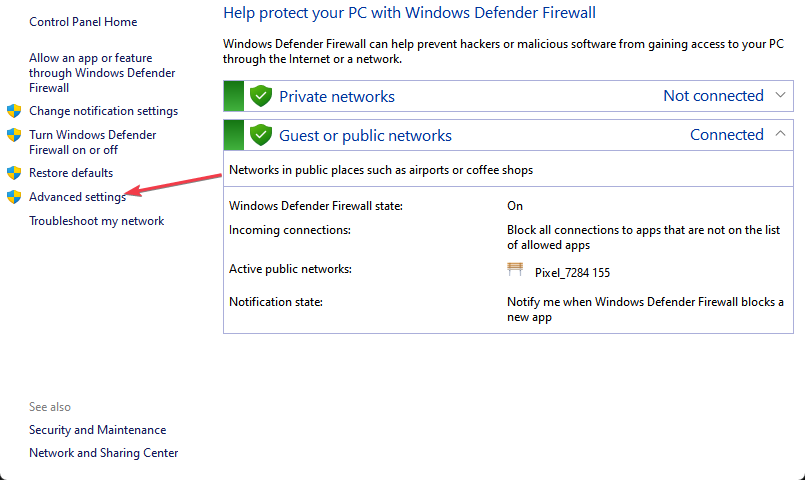
- Choose Superior Settings.
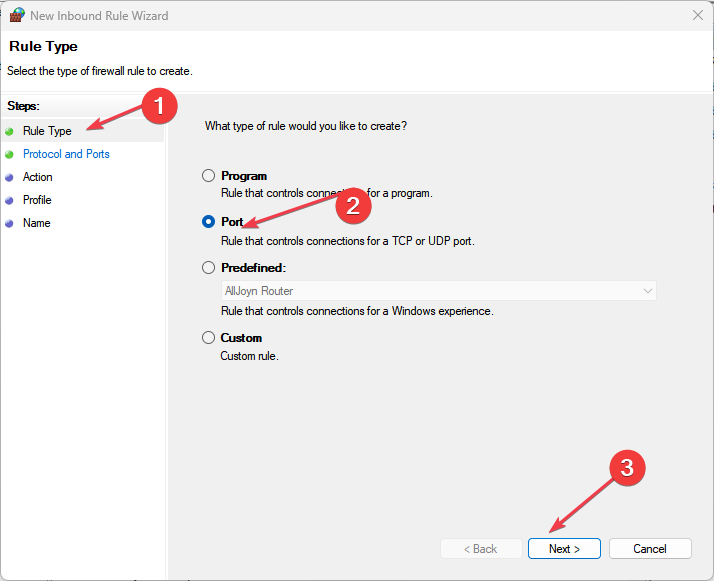
- Then, choose Inbound Guidelines and click on on New Rule within the Actions window.
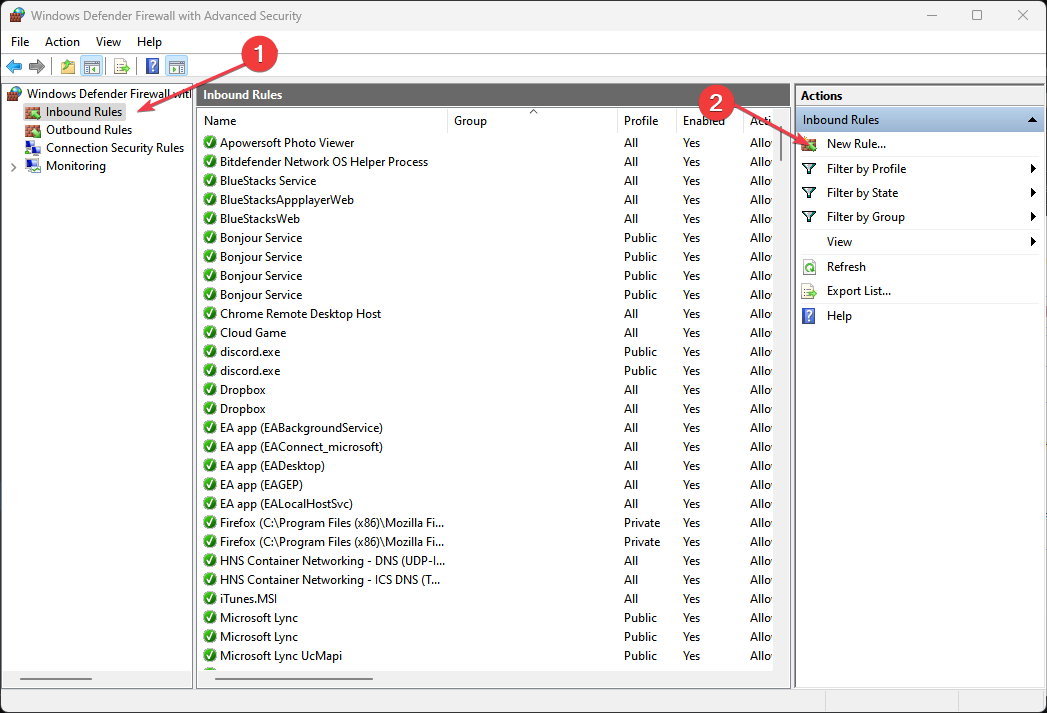
- Now, select Rule Sort of Port and click on on Subsequent.
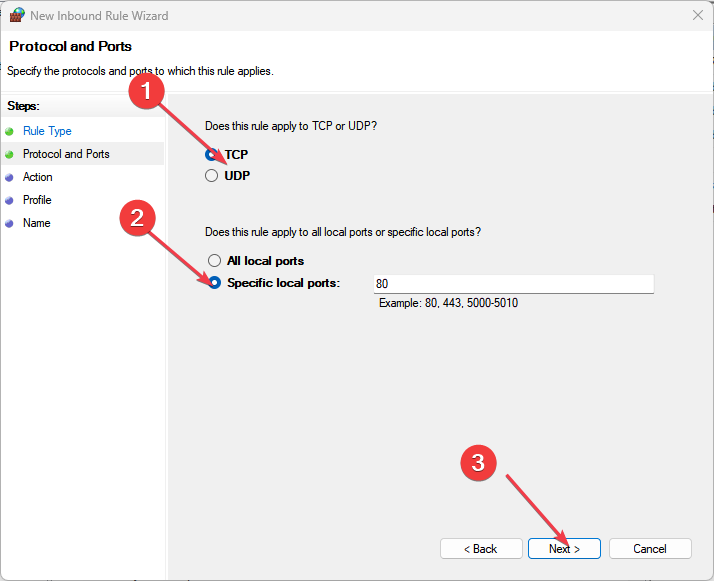
- On the Protocol and Ports net web page click on on TCP. Choose Particular Native Ports, kind a price of 587 or 25, and click on on Subsequent.
- On the Motion net web page click on on Permit the connection and click on on Subsequent.

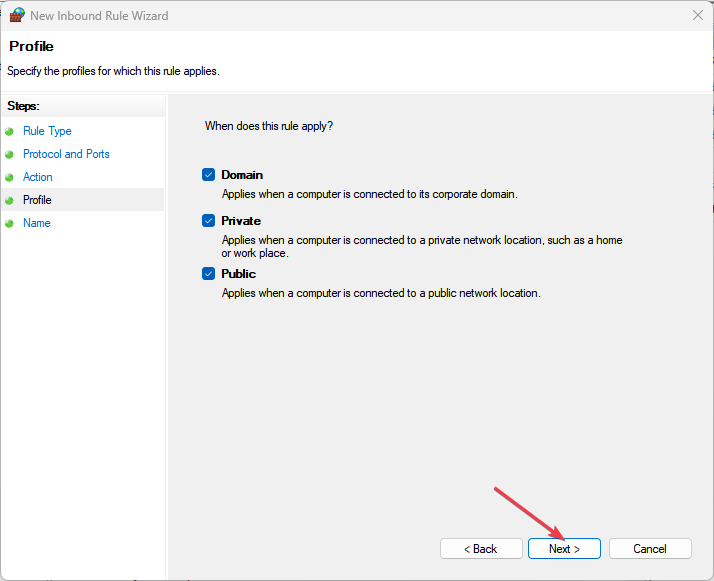
- Within the Profile net web page click on on the appropriate selections in your environment and click on on Subsequent.
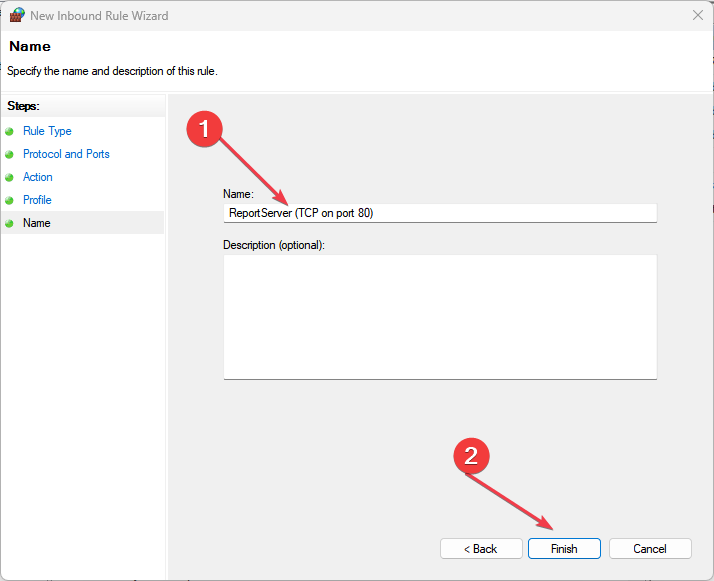
- On the Title net web page enter the establish of SMTP (TCP on port 587) and click on on End.
- Restart the laptop computer.
Port 587 or 25 is the default port for outgoing e mail web site guests. Most ISPs block this port nevertheless in case you enable TLS 1.2, you’ll require this port for e mail transmission to further enhance your security. It could even help avoid being blacklisted on e mail inboxes as spam because the port will now be free from restrictions.
4. Arrange SMTP server
4.1 Arrange by the use of space
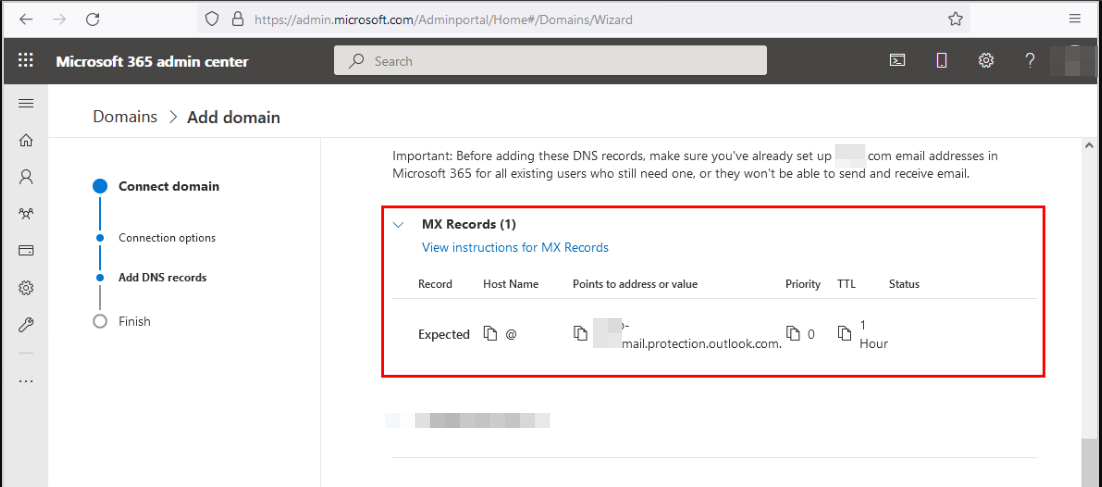
- Navigate to your browser and sign into your Microsoft 365 admin coronary heart account.
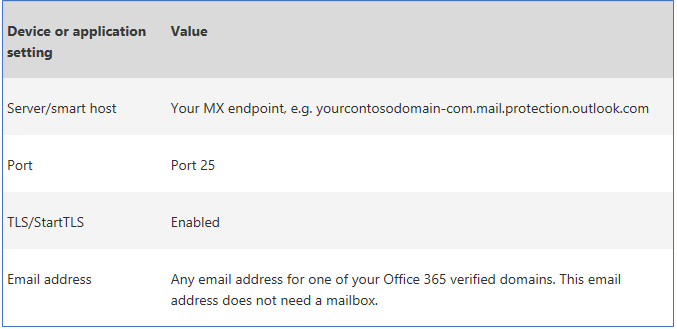
- Go to Settings > Domains and beneath your MX report, observe down the Level to deal with price. It must be one factor like: contoso-com.mail.security.outlook.com.
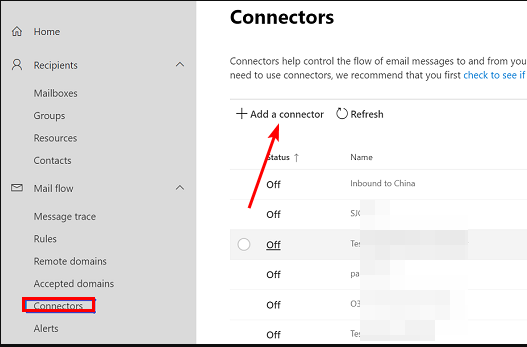
- Go once more to the admin coronary heart and navigate to Mail flow into > Connectors. If none is available on the market in your group, create one.
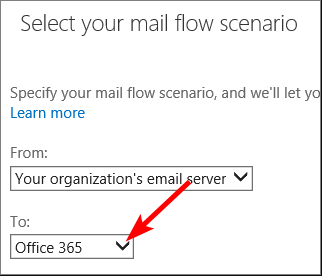
- Set your e mail flow into state of affairs to Workplace 365.
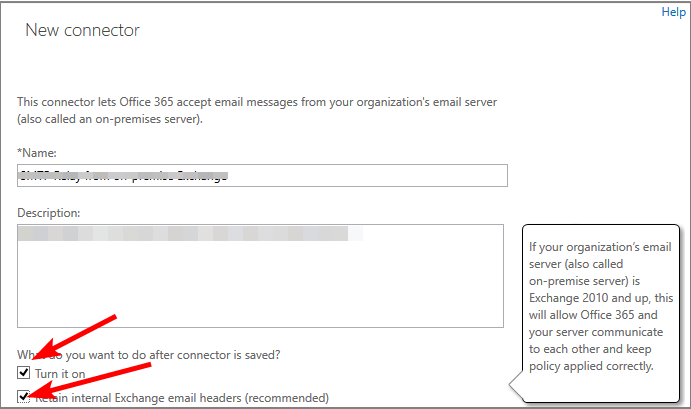
- Hit Subsequent, and supplies the connector a repute and short-term description.
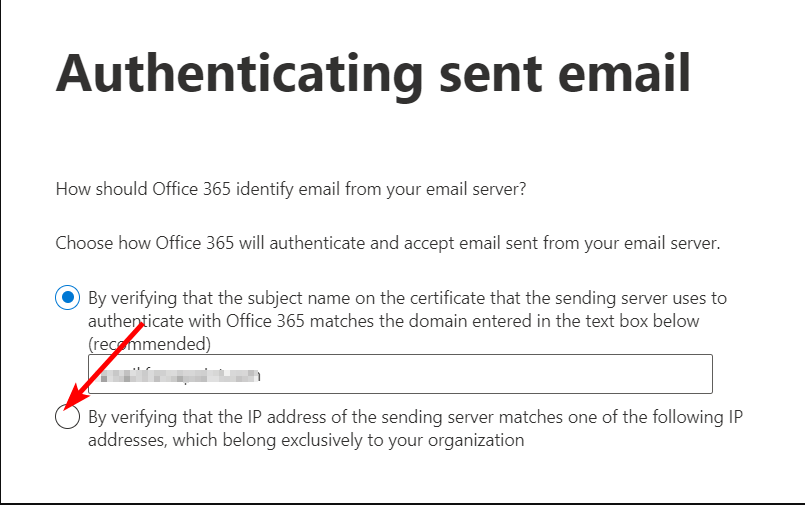
- Subsequent, study the By verifying that the IP deal with of the sending server matches one among these IP addresses that belong to your group subject and add the IP deal with from step 1.
- Hit Save and a summary will appear.
- You may ship a check out mail to confirm whether or not or not your emails are being acquired on the completely different end.
4.2 Arrange for specific particular person accounts
- Navigate to your browser and sign into your Microsoft 365 account or launch the Outlook mail app in your desktop.
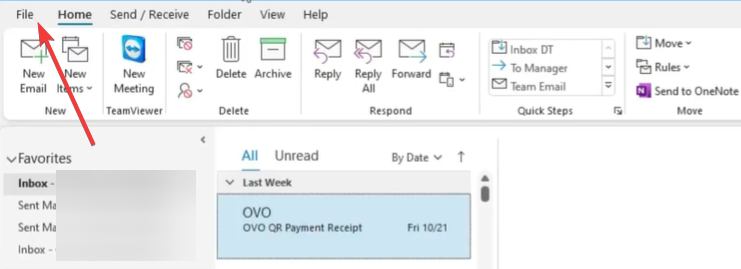
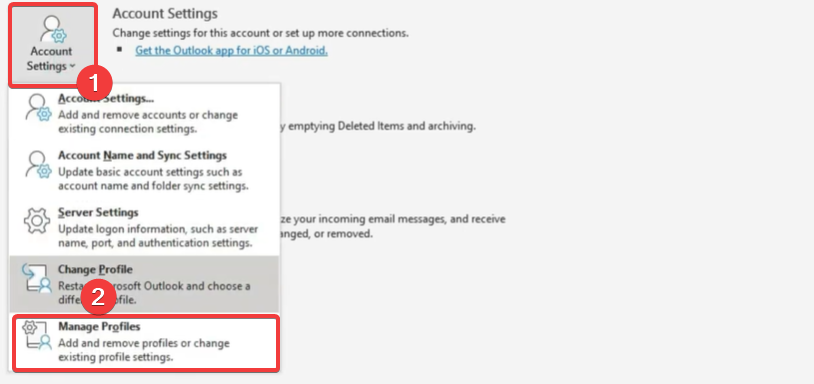
- Broaden Account Settings and select Handle Profiles.
- Click on on the E-mail Accounts button.

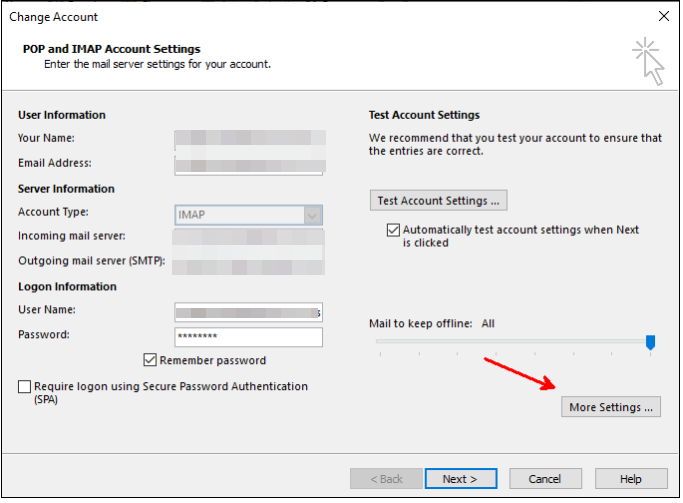
- Select your e mail account from the guidelines, click on on on it to decide on then hit Change.
- Click on on Extra Settings.
- Navigate to the Outgoing server tab and study the My outgoing server (SMTP) requires authentication and Go online using packing containers.
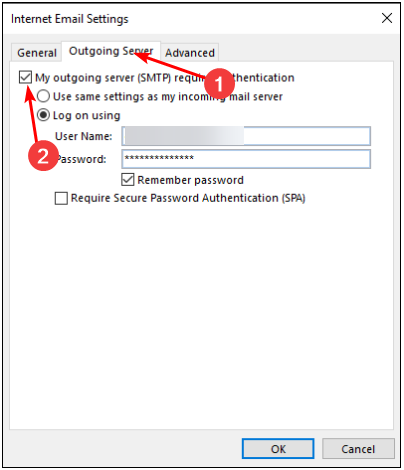
- Subsequent, switch to the Superior tab and beneath the Use the next form of encrypted connection, select SSL/TLS from the drop-down menu then hit OK.
Potential factors and biggest practices for SMPT server for Workplace 365
Your TLS certificates might expire while you’ve enabled SMTP authentication. A quick change of your system must restore this since most are supposed to be acceptable with positive OS variations.
In case the emails end up within the spam folder, evaluation your spam filtering settings or whitelist the actual sender/space.
For biggest practices, SMTP port points can occur at any time so study your firewall and neighborhood configurations ceaselessly to ensure it’s not blocking any connections and all essential ports keep open.
That’s all we had for this textual content. For those who’ve enabled an SMTP server in your Workplace 365, we’d equivalent to you to share your experience to this point. Drop us a comment down below.
Claire Moraa![]()
Data:
We’re proper right here to current Instructional Information to Every and Each Learner for Free. Right here We’re to Present the Path in route of Their Objective. This publish is rewritten with Inspiration.
Contact us for Corrections or Removing Requests
E-mail: [email protected]
(Responds inside 2 Hours)”